How To Customize Your View in Zimbra With View Modes
April 8th 2019
Note: As of 2025, we no longer provide hosting or support for Zimbra. This article is provided for reference only.
Every email program has a different default look and organization to it. Some may have the list of emails and the preview window side-by-side – others may have them above and below. Some may sort emails in a different way than you're used to. In the Zimbra email system that we at SilverServers provide to our clients, the web interface allows users to customize their experience so that the program operates similarly to any other email program they're used to. We're going to take a look at Zimbra' View Mode button – which provides all the customization anyone will need to make their email interface visually look and function the way they would like it to.
Near the top right of the screen in the Zimbra web interface is a small "View" button. This button gives you access to Zimbra's View Modes and allows you to quickly and easily switch to the mode and the organization method you prefer. Click on this button to get presented a dropdown menu with some options on it: By conversation, By Message, Reading Pane, Sort By, and Group by. For users of our Advanced packages, there is also a Display option. We're going to walk through each of these items with some pictures to give you an overview of all the ways you can customize the look and organization of your screen and your messages.
Threaded or Individual Email Messages
The first two options from our dropdown list – "By conversation" and "By message" – are related, so we'll look at them together. These two options let you decide whether you would like to thread all of your messages on a specific Subject together, or if you would like to receive the messages one at a time.
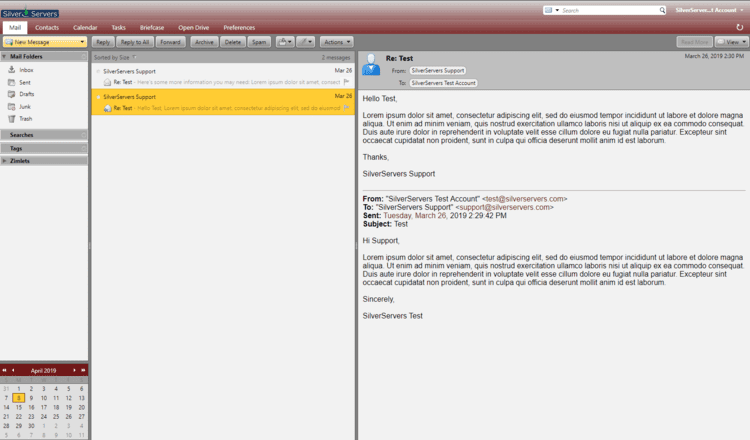
Choosing the "By conversation" option lets you thread your messages together by Subject. What does that mean? If you are emailing back and forth with a client on a specific topic, then instead of your clients' emails showing up individually on your email list, the whole conversation sits inside one "message" in your inbox. This mean you only need to click on one place in order to see the entire conversation between you and your client – which includes both the received and sent emails.
The "By message" option is the more traditional option which displays each message individually. This means that if you received 4 messages from a client on one Subject, there will be 4 individual emails in your Inbox. The messages you sent will be found in your Sent folder.
There are pros and cons to each options. Try them out to see which you like better!
Email Preview Beside or Below The List of Messages
Next we'll look at the “Reading Pane” item in the dropdown. Before we talk about the Reading Pane option, let's define what it is. The Reading Pane is the section of the web interface that displays the email when you click on it once. It allows for quickly reviewing messages without needing to double click each message to open in a separate window.
The Reading Pane item of our dropdown list gives you three options that change the look of your web interface: At The Bottom, At The Right, and Off. At The Bottom puts the reading page at the bottom of the screen, At The Right puts it on the right, and Off turns it off. The Off options means you will always have to double-click your email messages in order to read them.
Sorting Your Email Messages
Back in our main dropdown menu, the next selection is “Sort by.” There are other ways to make these selections in the web interface, but this selection give you all of the available options for sorting your email messages. You can sort by date, who the messages are from, who they're to, how big they are, etc. This section may be affected by the option you choose in the Group By section.
Grouping Email Messages by Date, Sender, and More
The “Group By” option in the dropdown menu allows you to organize your email messages even further. Selecting one of these options will place headings into your email list depending on the option selected. Grouping by Date will place headings like "Today", "Yesterday", "Last Week", "This Month", and so on. Grouping by “From” places headings for each sender. This option could be a useful alternative to threading, if you don't like the look of threading. Grouping by Size add headings for email that are "Huge (1-5MB)", "Large (100-500KB)", and so on down to "Tiny (<10KB)". The other two options in this section allow you to sort the messages ascending or descending.
The Display Option
The Display option is available for clients who are using our Advanced Zimbra package. This option allows you to add or remove different columns from your Inbox. For example, if you don't want to see the message size or the folder it's in, you can remove those columns!
These functional customizations, along with the visual customizations available in the Preferences tab give the Zimbra web interface the ability to have the same functionality (and maybe even the same look) as other email programs that you're used to. If you have questions about Zimbra, its features, or our email package options, get in touch with us at SilverServers!
For more related content, check out the Email Support and Tips section of our blog!